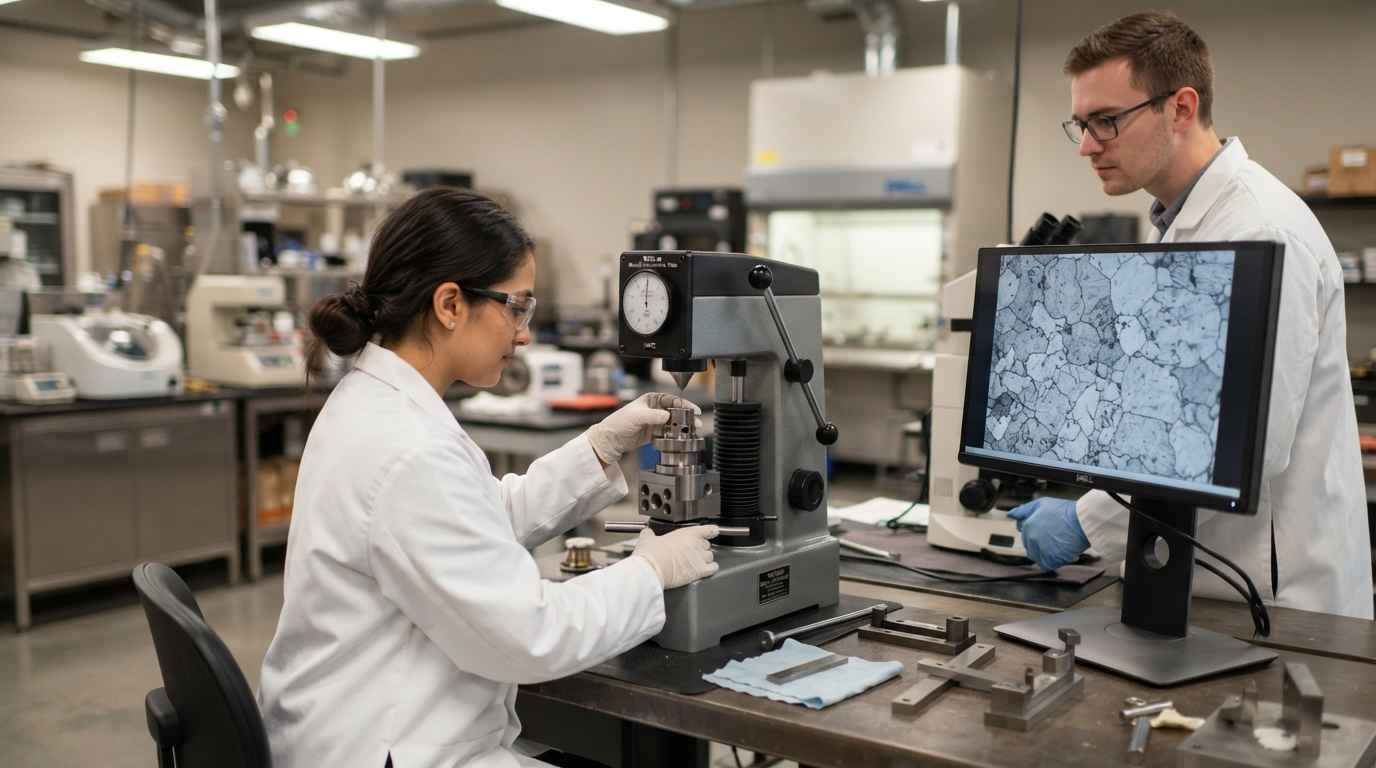
The difference between a ductile and a brittle fracture is written on the fracture surface: a ductile fracture deforms before breaking and leaves a fibrous, dull surface, while a brittle fracture breaks with almost no deformation and leaves a bright, faceted surface. Telling them apart correctly is the first step in any fracture diagnosis, because each mode points to a different cause (overload, embrittlement, a material defect or abnormal service conditions).
What are ductile and brittle fracture?
Fracture is the separation of a material into two or more parts under stress, and it is classified as ductile or brittle depending on how much plastic deformation accompanies it. This distinction is the foundation of failure analysis in metal components, because the fracture mode shapes the hypothesis about the root cause. Reading the pattern correctly avoids confusing a one-off overload with a progressive failure such as a fatigue fracture, which calls for a different reading.
Ductile and brittle are not closed labels but the two ends of a spectrum. Between them lie mixed fractures, where part of the section breaks with deformation and part by cleavage, and transitions where the same material changes behaviour with temperature or loading rate. Interpreting that spectrum well means describing not only the dominant mode but also where the crack started and how it propagated. That nuance is what separates a useful technical report, which guides the corrective action, from a simple label that does not explain why the part failed.
What is a ductile fracture
A ductile fracture is one that occurs after appreciable plastic deformation, with the material absorbing energy before separating. It is characterised by the formation of a neck (necking) in the fracture zone, shear lips at the edges and a fibrous, grey, dull surface. At the microscopic scale, the surface shows microvoids (dimples) that nucleate at inclusions or second phases and coalesce until rupture. Propagation is slow and stable, requires a continuous energy input and usually gives prior warning through visible deformation. In low- and medium-carbon steels at room temperature, the ductile mode is the expected behaviour under overload.
From a diagnostic point of view, the value of a ductile fracture is that the prior deformation records information about the direction and magnitude of the load that caused the break. The orientation of the shear lips, the reduction in section and the position where necking started help reconstruct the stress state. Materials such as austenitic steels, copper or annealed aluminium characteristically show this behaviour, and their rupture is usually linked to an overload beyond the design value rather than to a material defect. A clearly ductile fracture therefore steers the investigation towards service conditions and real loads, not towards the quality of the part.
It is also worth noting that ductility is not a fixed number but depends on the state of stress. A material that is ductile in a simple tensile test can behave in a much less ductile way under triaxial stress, for example at the root of a sharp notch or in a thick section where deformation is constrained. This is why the same alloy may show a fibrous fracture in a thin bar and a flatter, less deformed surface in a bulky part, without any change in composition. Reading the geometry together with the fracture surface is therefore as important as identifying the mode itself.
What is a brittle fracture
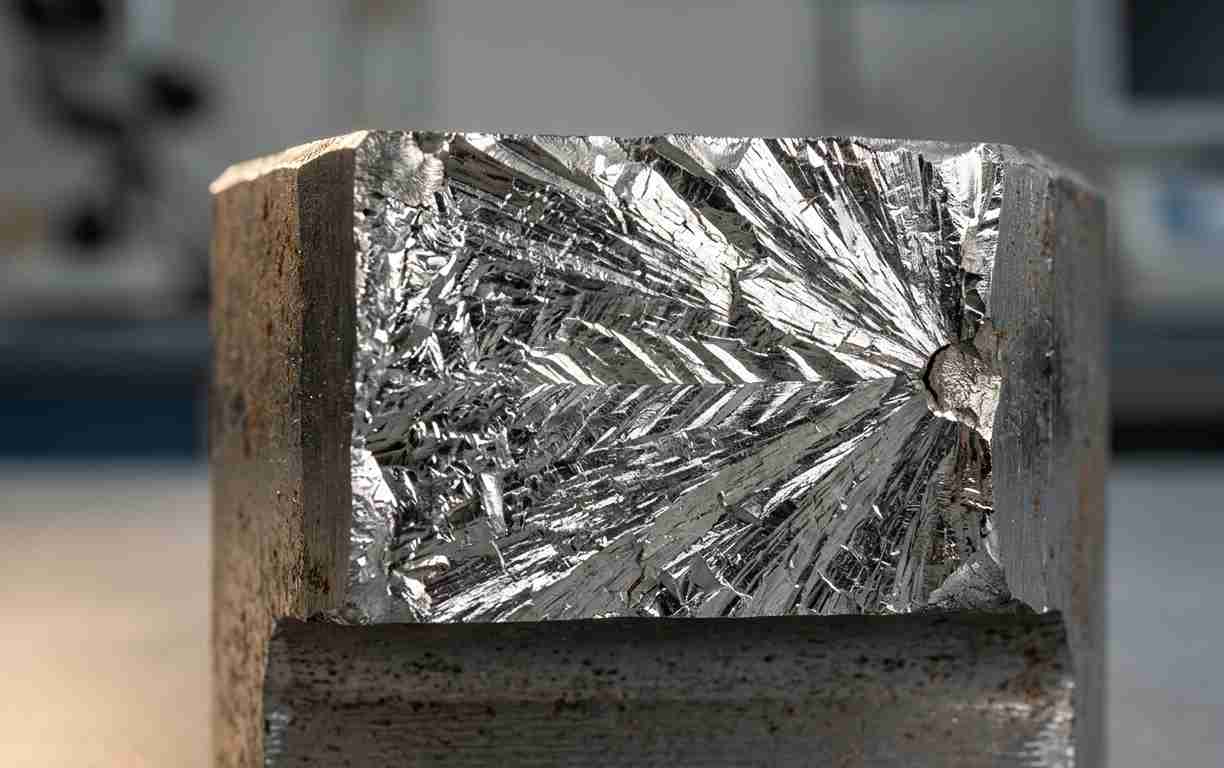
A brittle fracture is one that occurs with minimal or no plastic deformation, propagating rapidly and unstably once initiated. The surface is flat, perpendicular to the principal stress, with a bright, crystalline look caused by light reflecting off the cleavage facets. Chevron marks often appear, pointing back towards the crack origin, a very useful clue for locating the initiation point. At the microscopic scale, transgranular cleavage facets dominate or, when there is grain-boundary embrittlement, intergranular fracture. This mode is dangerous because it gives no prior warning: the part breaks suddenly, often below the design load.
It is worth distinguishing two variants of brittle fracture according to the path the crack follows. In cleavage (transgranular) fracture, the crack crosses the grains along crystallographic planes, leaving flat facets and river patterns. In intergranular fracture, the crack advances along the grain boundaries, which usually betrays embrittlement of the material (from impurity segregation, hydrogen or precipitates at the grain boundary). Recognising which one dominates is decisive, because the first points to loading or temperature conditions, while the second almost always signals a metallurgical problem in the material itself that should be traced back to its manufacturing origin.
Brittle fracture is also strongly size- and constraint-dependent, which is why laboratory coupons can behave differently from a full-scale component. A thick plate, a welded joint or a part with residual stresses provides more constraint, raises the local triaxiality and shifts the ductile-brittle transition to higher temperatures. Historically, many catastrophic brittle failures in ships, pipelines and pressure vessels combined the same three ingredients: a susceptible microstructure, a stress concentrator and a low service temperature. Recognising that combination in the fracture surface is what allows an analyst to explain a failure that, at first sight, seemed to occur below the design load.
A brittle fracture gives no warning: it propagates at high speed and with little energy, so identifying the factors that favour it (low temperature, notches or material embrittlement) is key to preventing catastrophic failures in service.
How to tell ductile from brittle fracture on the fracture surface
Distinguishing the fracture mode means reading the fracture surface at two levels: the macroscopic (with the naked eye or a loupe) and the microscopic (with electron microscopy). The combined reading allows the failure to be classified with judgement rather than intuition. An orderly examination of the fracture surface reveals more about the cause than many isolated tests, provided the part is preserved without damaging the fracture zone.
Macroscopic indicators on the fracture surface
The macroscopic examination distinguishes a ductile fracture from a brittle one by features visible without a microscope. The ductile surface is fibrous and dull and shows necking and shear lips inclined at about 45 degrees to the stress; the brittle surface is flat, bright and perpendicular to the load, with chevron marks converging at the origin. The presence or absence of deformation in the part is the first indicator: a section that has thinned before breaking indicates ductile behaviour, while a clean break with no change of shape suggests brittle behaviour. These indicators guide the analysis, but they do not replace microscopic confirmation when the diagnosis has technical or forensic implications, as in the failure study of an in-service component.
Documenting the fracture surface before handling it is an essential part of this stage. Photographing the part as received, recording the orientation of the break relative to the geometry and protecting the surface from corrosion and accidental knocks prevents the loss of irreplaceable evidence. A common mistake is to fit the two halves back together to check the match, a gesture that damages the surface relief and compromises the later analysis under the microscope. In failures with a possible legal dimension, this care in preserving the evidence is as important as the technical interpretation itself.
Sample preparation for the microscope is equally decisive. Cutting a specimen from a large part must avoid introducing heat or deformation that would alter the fracture surface, and cleaning must remove corrosion or debris without erasing the fine features. When the surface has oxidised in service, gentle chemical or ultrasonic cleaning can recover the underlying morphology, but an aggressive method can destroy the very dimples or facets that hold the diagnosis. Deciding how far to clean, and documenting each step, is part of a rigorous methodology rather than a minor technical detail.
Confirmation with SEM fractography
Fractography is the examination of the fracture surface with a scanning electron microscope (SEM) to identify the rupture mechanism at the micrometre scale. It confirms the ductile mode through the presence of microvoids (dimples) and the brittle mode through cleavage facets or intergranular fracture, and also distinguishes fatigue features such as striations when present. Fractography and microscopy tests are complemented by surface texture and microstructure analysis, which relates what is observed on the fracture to the microstructure of the material. This combination makes it possible to state, on a technical basis, whether the rupture was ductile, brittle or mixed, and answers how a failure hypothesis is validated.
The scanning electron microscope reveals not only the fracture morphology but also, through energy-dispersive X-ray microanalysis (EDX), the composition of inclusions, corrosion products or contaminants present at the crack origin. This information connects the initiation point of the rupture with its chemical cause: a non-metallic inclusion, an oxide layer or a localised embrittling element. Many real fractures are mixed, with an initiation zone of one type and a final propagation of another, and only fractography can separate those stages and reconstruct the real sequence of the failure.
Reading a fracture surface under the SEM is, in this sense, closer to reading a timeline than to taking a single snapshot. Beach marks and ratchet marks locate successive crack fronts, the transition from a flat fatigue zone to a rough final overload region reveals how much load the part could still carry, and the density of dimples hints at the local ductility at the moment of rupture. An experienced analyst uses these features to answer not only what mode dominated, but when and why the crack accelerated, information that a purely macroscopic look cannot provide and that is often decisive in a technical or forensic report.
| Feature | Ductile fracture | Brittle fracture |
|---|---|---|
| Plastic deformation | Appreciable (necking) | Minimal or none |
| Macroscopic appearance | Fibrous and dull, shear lips | Flat and bright, chevron marks |
| Surface under SEM | Microvoids (dimples) | Cleavage facets or intergranular |
| Propagation | Slow and stable | Fast and unstable |
| Prior warning | Yes, visible deformation | No, sudden rupture |

Have a similar case on your desk?
If you’d like to discuss it with our technical team, the first conversation is free and with no obligation.
What controls the fracture mode and why it matters in diagnosis
The fracture mode is not a fixed property of the material but the result of the interaction between the material, the temperature, the loading rate and the stress state. The same steel can break in a ductile or brittle way depending on the conditions, and understanding those factors is what turns reading the fracture into a root-cause diagnosis. Ignoring them leads to correcting the symptom and not the origin, with the risk that the failure repeats.
Temperature, loading rate and the ductile-brittle transition
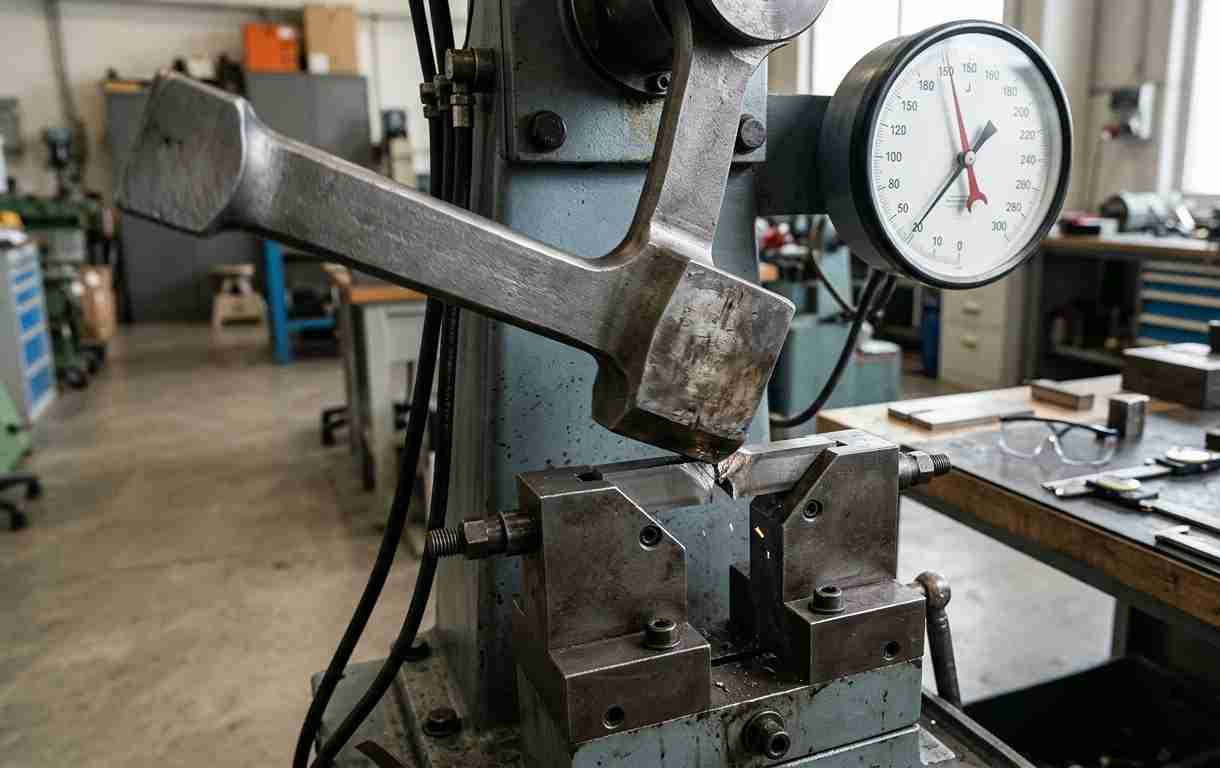
The ductile-brittle transition is the temperature range over which a material, typically ferritic steels, changes from ductile to brittle behaviour as it cools. Below the transition temperature, or under very fast impact loads, a steel that would be ductile at room temperature can break in a brittle way. This behaviour is quantified with the Charpy impact test (per ASTM E23 and ISO 148), which measures the energy absorbed at different temperatures and defines the transition curve. Characterising the mechanical properties is essential in sectors such as energy, construction or automotive, where components operate at low temperature or under impact loads.
The rate at which the load is applied has an effect analogous to temperature: the faster the loading, the less time the material has to deform plastically and the more its behaviour shifts towards the brittle mode. That is why a part that comfortably withstands a static load can break in a brittle way under an impact. This coupling between temperature, loading rate and stress triaxiality explains why the same component can behave in opposite ways in different service scenarios, and it means the analysis must reproduce the real conditions in which the failure occurred, not generic laboratory conditions.
The Charpy transition curve is a practical way to capture this behaviour, but it must be read with care. What matters for a real component is not a single absolute value but where the service temperature sits relative to the transition: a part operating on the upper shelf will tolerate defects that would be critical for the same steel on the lower shelf. For welded structures, the toughness of the heat-affected zone, rather than that of the base metal, often governs the risk, which is why fracture analysis in these cases pays particular attention to the weld and its immediate surroundings.
Microstructure, defects and stress concentrators
The microstructure and internal defects determine whether a crack propagates in a ductile or brittle way. A coarse grain, the presence of brittle phases, inclusions, pores or embrittlement from hydrogen or tempering reduce toughness and favour cleavage. Stress concentrators (notches, abrupt section changes, machining marks or weld defects) locally raise the stress and can trigger a brittle fracture even when the material is nominally ductile. That is why the failure mode study cross-checks the fracture surface with the geometry of the part and its manufacturing history, an approach applied in cases such as the root-cause analysis of failures in factory equipment.
Heat treatment and forming processes leave a decisive mark on toughness. A quench without tempering, a weld with a hardened heat-affected zone or grain growth from overheating produce microstructures prone to cleavage. In welded components, a large share of brittle fractures start precisely in the heat-affected zone or at weld defects, where a brittle microstructure and a stress concentrator coincide. Relating the observed fracture mode to these process antecedents is what makes it possible to decide whether the corrective action should target the material, the design or the manufacturing.
Structured methodologies help keep this reasoning disciplined. Frameworks such as 8D or an Ishikawa (fishbone) diagram organise the possible causes into material, design, process and service branches, so the fracture evidence can be mapped against each one instead of jumping to a conclusion. In practice, the fracture surface narrows the field, the microstructure and chemistry confirm the material condition, and the loading history closes the case. This ordered approach is what turns a set of observations into a defensible root-cause statement that a manufacturer can act on with confidence.
The same steel can break in a ductile or brittle way depending on temperature, loading rate and the presence of notches: the fracture mode describes the conditions of the failure, not just the material.
Confirming the role of those defects calls for the metallographic examination of the microstructure, which reveals whether the material started from an already compromised state.
Keys to reading the fracture surface with judgement
Distinguishing a ductile from a brittle fracture requires combining the macroscopic examination, SEM fractography and knowledge of the service conditions, always contrasting what is observed with the microstructure and geometry of the part. There are three keys: read the surface features (deformation, brightness, dimples or cleavage), identify the origin point through the chevron marks, and place the failure in its context of temperature, load and defects. A rigorous diagnosis distinguishes a one-off overload from progressive embrittlement and steers the corrective action towards the real cause.
If you have a broken part and need to know whether it failed by overload, fatigue or a material defect, don’t force the two halves back together: keep it as is and tell us the case.
Frequently asked questions about ductile and brittle fracture
How can I tell at a glance whether a fracture is ductile or brittle?
At a glance, a fracture is ductile if the part shows deformation before breaking (necking, thinning) and the surface is fibrous and dull; it is brittle if it breaks with no change of shape and the surface is flat and bright. Chevron marks on a bright surface confirm the brittle mode and indicate the crack origin. Even so, visual inspection only guides: for a defensible diagnosis it is best to confirm the mechanism with SEM fractography.
Why can a ductile steel break in a brittle way?
A normally ductile steel breaks in a brittle way when conditions reduce its ability to deform: low temperature below the ductile-brittle transition, very fast impact loads, the presence of notches or stress concentrators, or embrittlement of the material (from hydrogen, tempering or grain growth). In these cases the energy needed to propagate the crack drops and the material behaves in a brittle manner even though its composition has not changed.
Which techniques confirm the fracture mode?
The reference technique is fractography with a scanning electron microscope (SEM), which distinguishes microvoids (ductile) from cleavage facets or intergranular fracture (brittle) and detects fatigue striations. It is complemented by the Charpy impact test for the ductile-brittle transition, by hardness and tensile tests for the mechanical properties, and by microstructural analysis to relate the fracture to the state of the material. Combining these techniques allows the failure to be classified on an objective basis.
What are the risks of not identifying the fracture type correctly?
Not identifying the fracture mode correctly leads to attributing the failure to the wrong cause and applying corrections that do not solve the problem. Mistaking a brittle fracture caused by embrittlement for a simple overload can leave the root cause active and cause new ruptures, with risk to safety and cost from claims or downtime. A correct diagnosis of the fracture mode steers the action towards the material, the design or the process as appropriate.
How long does a fracture analysis take and what determines its cost?
A fracture analysis usually takes between one and four weeks depending on the complexity of the case and the number of techniques required, with an urgent mode for critical situations of line stoppage or litigation. The cost depends on the scope: a macroscopic examination with basic fractography is relatively quick, while a full study with electron microscopy, EDX, mechanical testing and microstructural analysis requires more resources. Having the part unhandled, a healthy reference sample and the manufacturing documentation reduces the scope and therefore the cost and turnaround of the diagnosis. For critical cases, an initial screening can be delivered first, with the full report following once every technique has been completed.